


Looking for an easy and fun way to bring a touch of fall into your home? These DIY “leaf catchers” are the perfect craft to enjoy with your little ones! With just a few supplies, you can create a beautiful seasonal decoration that captures the cozy colors of autumn!
In this article, you’ll find two simple ways to make your leaf catcher, using either real or fake leaves, so you can choose the option that works best for you. Check out the list below to get started!
Leaf Catcher Supplies
- Laminating sheets
- Real or fake leaves (fake leaves can be purchased at Hobby Lobby, Michael’s or your local craft store)
- Construction paper (ideally black, so the leaf colors pop, but any color works)
- Hole puncher
- Scissors
- Pencil
- Glue stick
- Double sided tape
- Clothing iron
- 2 circle tupperware lids (One large, and one medium)
- String or yarn
- Command hooks
Safety Tip: Before you begin, plug in and heat your iron on a high surface, safely out of reach of children and pets. Place a towel underneath while ironing to prevent heat damage.
Instructions
Step 1: Create Your Frames
Use your two circle Tupperware lids and two sheets of construction paper.
- Trace the large lid onto one sheet to make your outer circle.
- Then, place the medium lid inside the large circle and trace again to form a ring or “frame.”
- Repeat this process on the second sheet to make the back frame.
- Cut out both frames carefully with scissors and set them aside.
Step 2: Arrange the Leaves
Separate the laminating sheets and lay one flat on a hard surface. Arrange your leaves however you like—just be sure they are close together so they fit neatly inside your circle frame. Once you’re happy with how it looks, place your second laminating sheet on top.
Step 3: Seal the Leaves
Use your clothing iron to gently press and adhere the two laminating sheets together. Move the iron slowly across the surface until the sheets are fully stuck together and form one solid piece.
Step 4: Attach the Frames
Take one of the construction paper frames and apply glue on it. Gently place it over your laminated leaf sheet, and center the circle so the leaves fit. Flip the sheet over, and glue the second frame on the other side, sandwiching the laminating sheet between the two circle frames.
Step 5: Trim and Punch
Trim around the edges of your circle frame to remove any excess laminating sheet. Then, use your hole punch to make one hole at the top for hanging.
Step 6: Hang Your Leaf Catcher
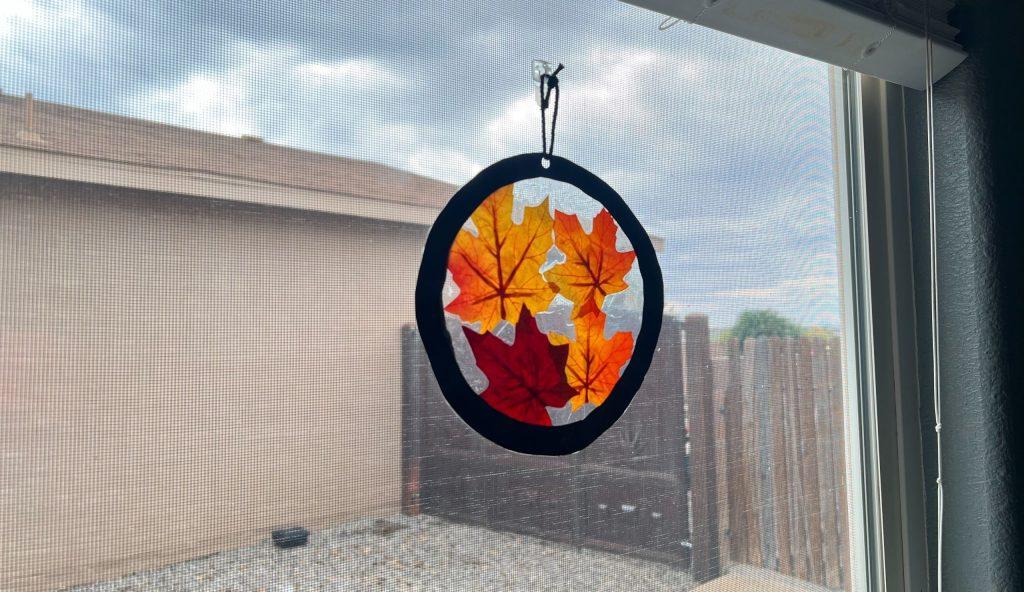
Cut a piece of string or yarn to your desired length and loop it through the hole. Use a command hook to hang your finished leaf catcher in a sunny window!
And there you have it! Your very own fall leaf catcher! Whether you have used real or store-bought ones, you have created a one-of-a-kind keepsake, perfect to blend cohesively with your fall decor!
For more fall crafts, check out 5 Fall Albuquerque Crafts for Kids.


